Whether you're a professional painter in a body shop or a dedicated enthusiast working in your garage, masking a car is more than just slapping tape and paper on it. It's the difference between a crisp, factory-like finish and a job that looks, well, "DIY."
The right technique protects delicate trims, creates razor-sharp lines, and prevents expensive rework. Let's walk through five essential methods that every detailer, painter, and restorer should have in their skill set.
1. Back Masking (or Reverse Masking)
This is the secret weapon for a seamless repair, especially on spot fixes or feathered edges where you don't want a visible "ledge" of new paint.
What it is: Instead of taping the edge of the area you want to paint, you tape the edge of the area you don't. The tape is applied with its adhesive side facing outwards at the transition line, and the masking paper is then folded back over the tape. This lifts the paper away from the repair area right at the boundary.
When to use it: For blending clear coats, spot repairs, and any area where you need the new paint to fade gradually into the old. It prevents a hard, noticeable paint line.
Tape Choice: A delicate surface masking tape with low-tack adhesive is crucial here. It must hold securely but remove cleanly from the original paint without any damage or residue.
2. Pinstriping & Fine Line Masking
This technique is all about precision for creating crisp stripes, accents, or perfect two-tone separations.
What it is: Using very fine, flexible automotive detailing tape to lay out complex curves and straight lines. For pinstriping, it often involves applying the tape as a guide, painting, and then carefully removing it to reveal a perfect stripe.
When to use it: Creating racing stripes, coach lines, accent colors on body creases, or separating colors in a two-tone paint job.
Tape Choice: You need a decorative masking tape that is thin, highly flexible (automotive masking tape for curves is a must), and has consistent adhesion. QKD manufactures tapes with excellent conformability, allowing them to lay flat on complex contours without lifting or buckling.
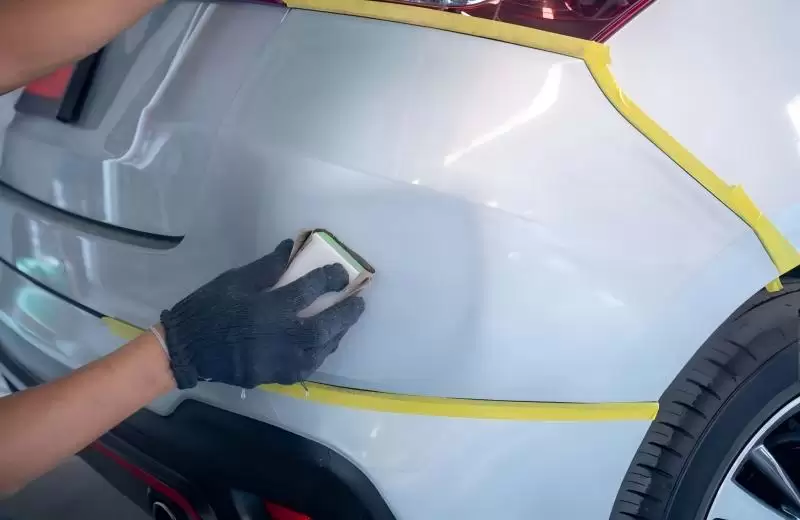
3. Surface Protection Masking (for Trims, Windows, and Mouldings)
This is your standard, full-coverage masking to protect everything you're not painting.
What it is: Systematically covering large, non-paint areas like windows, rubber seals, headlights, and chrome trim with a combination of tape and masking film or paper.
When to use it: Before any major painting job, from a bumper respray to a full-body repaint. The goal is zero overspray.
Tape Choice: For borders, a reliable, general-purpose automotive detailing tape works. For direct contact with sensitive rubber or plastic trim, a gentle, delicate surface masking tape is better. For visual contrast and easy edge identification, many painters prefer black masking tape against light-colored bodywork.
4. Cavity & Gap Masking
Overspray has a sneaky way of finding every tiny opening. This technique seals them shut.
What it is: The strategic placement of tape or specialized materials into gaps—door jambs, trunk seams, hood edges, and body panel joints—to prevent paint from drifting inside.
When to use it: During any spray job, but especially full resprays. It protects door seals, hinges, and interior spaces from a fine dusting of paint.
Tape Choice: Narrow-width tapes are ideal for tucking into tight spaces. Sometimes, soft foam cord or clay-like masking products are used in conjunction with tape to create a perfect seal in irregular gaps.
5. Wrap-and-Stretch Masking for Complex Shapes
How do you mask a side mirror, a door handle, or a wiper arm? You wrap it.
What it is: Using the flexibility of masking material to envelop a three-dimensional object completely. This often involves stretching the tape and paper to form a tight, conforming "bag" around the part.
When to use it: For masking protruding components that are too time-consuming to remove, but need full protection on all sides.
Tape Choice: This demands a tape with exceptional stretch and conformability. High-quality automotive masking tape for curves is designed to elongate slightly and cling tightly to irregular shapes without snapping back or losing adhesion.
Why the Tape Itself is Half the Battle
You can have perfect technique, but if the tape fails—by leaving adhesive residue, tearing upon removal, or not sticking in the first place—the job is ruined. This is where material engineering matters.
At QKD, we understand that masking is a critical process, not just a prep step. With over 15 years of experience, our 15,000㎡ vertically integrated production base allows us to engineer our automotive detailing tape from the molecular level up. We control the adhesive formulation and backing paper to achieve precise tack levels: aggressive enough to hold on curves, yet gentle enough for delicate surface masking tape applications on trims and fresh paint.
Our products are ISO 9001 certified and comply with UL, IEC, CE, and RoHS standards, ensuring global reliability. Whether you need a standard black masking tape for high-visibility edges or a custom-formulated decorative masking tape for a specific paint system, our OEM/ODM services ensure you get a tape that performs as an extension of your expertise.
Mastering these five techniques will elevate your finishing work from amateur to professional grade. Remember, the cleanest paint job is always the one protected by the smartest masking strategy.
Looking for masking tapes engineered to match your skill level? Explore QKD's range of automotive masking solutions, where precision meets performance.